Your DSLR camera is more than just a piece of tech; it’s the tool you use to capture the world. But dust, smudges, and grime are inevitable enemies of every photographer. A dirty camera can lead to spotty images, malfunctioning parts, and costly repairs. This guide will walk you through the process of cleaning your DSLR camera safely and effectively, ensuring your gear is always ready for that perfect shot. Learning these simple maintenance tips will help you protect your investment and keep your photos looking pristine.
How to Keep Your DSLR Camera Spotless
Keep your DSLR camera spotless with our expert guide. Discover how to clean your camera’s sensor, lens, and body safely to ensure consistently perfect photos.
Why Regular Camera Cleaning Matters
Think of regular cleaning as preventative care for your camera. Dust on your lens can create soft spots in your photos, while a dirty sensor will leave noticeable dark specks on every image you take. Fingerprints on the lens can cause flare and reduce contrast.
Beyond image quality, dirt and dust can work their way into the camera’s delicate internal mechanisms, like the shutter or focus rings, leading to performance issues. Establishing a routine cleaning habit not only guarantees better photos but also extends the life of your equipment, saving you from potential professional repair bills down the line. It’s a small investment of time that pays off with every click of the shutter.
Your DSLR Cleaning Toolkit
Before you start, it’s crucial to have the right tools. Using improper materials, such as a t-shirt or paper towels, can scratch your lens or leave behind more lint than you started with. A basic, high-quality cleaning kit is an essential accessory for any photographer.
Here’s what you’ll need:
- Air Blower: A manual, rocket-style air blower is ideal for gently removing loose dust from the camera body, lens, and even the sensor without physical contact. Avoid using compressed air cans, as the force can be too strong and the propellants can damage sensitive components.
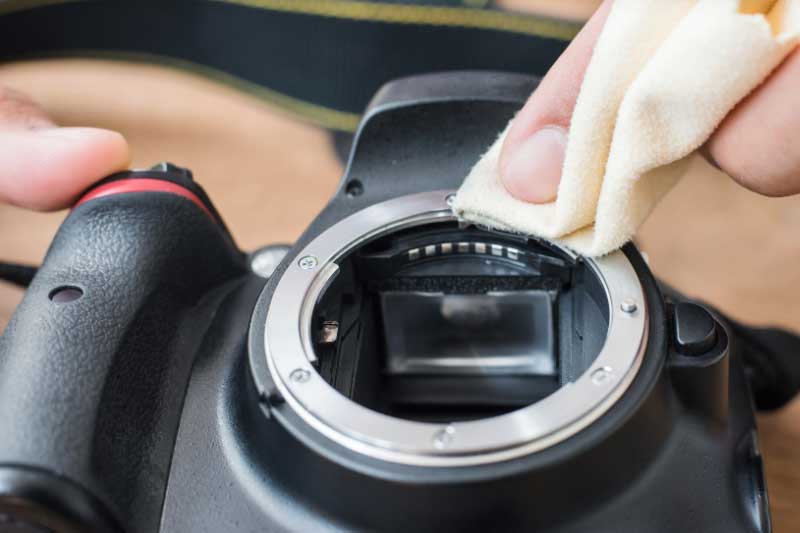
- Microfiber Cloth: A clean, soft microfiber cloth is your go-to for wiping down the camera body, LCD screen, and the outer barrel of the lens. Keep a few on hand and wash them regularly.
- Lens Cleaning Pen: This dual-sided tool is a must-have. One side has a soft, retractable brush for sweeping away larger particles, and the other has a carbon-based cleaning tip designed to safely remove smudges and oils from the lens glass.
- Lens Cleaning Solution and Wipes: For stubborn smudges, a few drops of a dedicated lens cleaning solution on a lens tissue or a pre-moistened lens wipe can work wonders. Never spray the solution directly onto the lens.
- Sensor Swabs and Solution (for Advanced Cleaning): Cleaning the camera’s sensor is a delicate process. If you’re comfortable with it, use sensor swabs specifically designed for your camera’s sensor size (full-frame or crop) along with an appropriate cleaning solution.
Step-by-Step Cleaning Guide
Now that your toolkit is ready, let’s get to cleaning. Find a clean, well-lit, and dust-free area to work in.
1. Cleaning the Camera Body
The body is the easiest part to clean and a great place to start.
- Turn off the camera and remove the lens, placing the body cap on to protect the interior.
- Use your air blower to puff away any loose dust from the exterior, paying attention to dials, buttons, and crevices.
- Use your microfiber cloth to gently wipe down the entire camera body, including the grip and LCD screen. If there’s stubborn dirt, you can slightly dampen a corner of the cloth with water, but be careful not to let any liquid seep into the camera.
2. Cleaning the Lens
Your lens is the eye of your camera, and it deserves special attention.
- Attach the rear lens cap and use the air blower to remove dust from the front and back glass elements.
- Use the soft brush on your lens cleaning pen to gently sweep away any remaining stubborn particles. Work from the center outwards.
- For fingerprints or smudges, use the carbon-tipped end of the lens pen. Move it in a circular motion from the center of the lens to the edges. The carbon compound is excellent at absorbing oils.
- If smudges persist, apply one or two drops of lens cleaning solution to a fresh lens tissue (not the lens itself) and wipe gently in a circular pattern. Follow up with a dry tissue to remove any streaks.
3. Cleaning the Mirror and Viewfinder
The mirror inside your DSLR is extremely fragile.
- With the body cap removed, hold the camera with the lens mount facing down to allow dust to fall out.
- Use your air blower to direct a few puffs of air onto the mirror. Do not touch the mirror with anything—no brushes, cloths, or swabs. The surface is incredibly delicate and scratches easily.
- Wipe the viewfinder eyepiece with a microfiber cloth to remove any smudges from your face or fingers.
4. Cleaning the Sensor (Advanced)
Sensor cleaning can be intimidating, but it’s a necessary skill if you frequently change lenses. If you see persistent spots in your photos (especially when shooting at a small aperture like f/16), it’s likely your sensor is dirty.
If you are not comfortable performing this step, it is best to send your camera to a professional service, such as US Camera Repair. Mishandling the sensor can lead to permanent damage.
If you choose to proceed:
- Ensure your camera has a fully charged battery. Many cameras will not allow you to access the sensor for cleaning on low power.
- In your camera’s menu, find the “Clean sensor” or “Lock mirror up for cleaning” mode. This will lift the mirror and open the shutter, exposing the sensor.
- Hold the camera with the lens mount facing up. Use the air blower to dislodge any loose dust. Often, this is enough.
- If wet cleaning is necessary, take a new sensor swab and apply one or two drops of sensor cleaning solution to the tip.
- With a single, steady motion, sweep the swab from one side of the sensor to the other.
- Flip the swab over and sweep back in the opposite direction using the clean side.
- Dispose of the swab—never reuse it. Turn the camera off to return the mirror to its normal position.
When to Seek Professional Help
While routine cleaning can be done at home, certain tasks are best left to the professionals. If you’ve tried cleaning your sensor and spots remain, or if your camera has been exposed to water, sand, or a significant impact, it’s time to call in a professional. Technicians at a reputable service center, such as US Camera Repair, have the specialized tools and clean-room environments necessary to perform deep cleaning and complex repairs without risking further damage. They can handle everything from sensor calibration to shutter mechanism repairs, ensuring your gear performs to manufacturer standards.
Keep Your Gear Ready for Action
Regularly cleaning your DSLR is a fundamental part of being a photographer. It’s a simple ritual that protects your equipment, ensures your photos are free of distracting flaws, and helps you stay connected to your most important creative tool. By following these steps and knowing when to call a professional, you can be confident that your camera will be ready to capture stunning images for years to come.
If you’re facing a problem beyond a simple clean, don’t hesitate to reach out. Get a free estimate from our expert technicians at US Camera Repair to get your gear back in perfect condition.